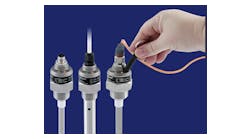
There are times when the seemingly mundane comes into focus. “Garden variety” pressure gauges are often considered commodities due to their relatively low cost in relation to the overall project. Their quick “off-the-shelf” delivery does not help this image. Yet these gauges are important to the operation of many processes, such as when pressure gauges are used to verify and/or manually set process operating parameters.
As I was wandering the ISA Show in Houston last year, I noticed a company that was aggressively touting its pressure gauges. Curious, I inquired about the gauges and found that their accuracy was specified as a percentage of actual pressure. My experience had been that pressure gauges were specified in terms of a percentage of full scale. This distinction is similar to the difference between percentage of rate and percentage of full scale for flowmeter performance. If I had not recognized this, I might have missed the significance of this statement entirely. My paradigm that pressure gauges are percentage of full scale devices was now in question.
Consider the errors associated with these statements for two pressure gauges calibrated for 0-100 units, where one performs within 1 percent of actual pressure and another performs within 1 percent of full-scale pressure (Table 1).
|
||||||||||||||||||
To provide a common basis for comparison, these seemingly similar specifications should be compared in like engineering units, such as in pressure units or as a percentage of actual pressure. When this comparison is performed using the table above, the pressure gauge specified as a percentage of actual pressure is superior to the pressure gauge specified as a percentage of full scale.
Performance of a pressure gauge with percentage of full-scale specifications can be improved by operating the gauge in the upper part of its range. However, doing so exposes the gauge to over-ranging and the subsequent calibration shift or damage that can occur if higher pressures occur during process upset conditions. To provide some protection, it is common practice to select gauges such that the typical operating pressure is about half of full scale. In this example, a pressure gauge exhibiting 1 percent of full-scale performance and operating at half scale will perform within 2 percent of actual pressure. Performance will be further degraded at lower pressures.
Complicating the issue, a pressure gauge that exhibits percent of actual pressure performance may only do so from 25 percent to 100 percent of its full scale. Performance where the absolute error remains constant below 25 pressure units is as follows (Table 2).
|
||||||||||||||||||
In this case, the pressure gauge specified in terms of the actual pressure is superior to the pressure gauge specified in terms of its full scale. This may not necessarily be true when the numerical values of the specifications are different. Careful analysis may be necessary to determine the performance of the pressure gauge at the various operating pressures.
David W. Spitzer, P.E. is a regular contributor to Flow Control. He has more than 25 years of experience in specifying, building, installing, start-up, and troubleshooting process control instrumentation. He has developed and taught seminars for almost 20 years. Mr. Spitzer is a member of ISA and belongs to ASME MFC and ISO TC30 committees. He has published a number of books concerning the application and use of fluid handling technology, including the popular The Consumer Guide to… series, which compares flowmeters by supplier. Spitzer is a principal in Spitzer and Boyes LLC, which offers engineering, product development, marketing, and distribution consulting for manufacturing and automation companies.


