As with all industries, it is necessary to ensure customers are getting what they paid for and companies are getting paid for what they provide. With the oil and gas industry, the way to measure what is being transported by pipeline is through pressure and temperature transmitters. Changes in temperature, pipeline pressure and any pressure drop across the pipeline can cause issues with the flow of oil or gas through that pipeline. Measuring these items can ensure accuracy throughout the transportation process and make sure both buyer and seller are getting a fair deal.
Because the prices are established from those measurements, it is imperative to get accurate and fair numbers. To accurately take these measurements with a high degree of certainty, regularly calibrating the pressure and temperature transmitters guards against any incorrect measurements and double checks the flow throughout process control systems.
While pressure instrumentation can be found in almost every process plant, calibrating these instruments correctly can often be frustrating. It is a necessary part of optimizing operations and ensuring plant safety when dealing with process control systems.
What is a pressure calibration?
A calibration of any instrument is done by comparing a series of measurements on the unit under test (UUT) to a universally accepted reference standard. These reference standards are predetermined based on the use cases, measurement needs and timing of the DUT and are traceable to national or internal standards to ensure a baseline for all measurements used within an industry.
Performing a pressure calibration with a slow leak
Proper pressure calibration requires dependable equipment and connectors. But a leaking pressure source can make it difficult to keep the pressure stable at a calibration point long enough to get a reliable reading. Slow leaks can require constant fine-tuning and adjusting pressure applied from a pump, which makes it difficult for the system to settle.
When calibrating, it is recommended that the system settle for several seconds, or even a minute, after the pressure set point is reached but before testing begins, so a more accurate and repeatable test result can be performed.
While slow pressure leaks caused by damaged hoses, worn fittings or improper connections are common, there are several steps technicians can take to ensure a better calibration experience.
- Test and debug the pressure test systems before entering the field. This can help reduce unnecessary trips back to the shop.
- Try to decrease the number of pressure connections. Use the correct hose length and remove extra fittings throughout the system.
- Ensure the test equipment is properly connected.
- Mitigate leaks by using special-purpose test hoses and fittings. There are test hoses designed with “no tools required connections.”
- Use a pressure calibrator with an internal, automatic electric pump. Some automatic pressure calibrators have an internal, automatic electric pump that can self-regulate pressure during tests, so technicians do not need to make manual adjustments. The automatic pressure regulation compensates for slow leaks in test setups to provide more accurate and dependable results.
Manually generating and controlling the pressure for each test point
Pressure calibrations in process manufacturing facilities require a test strategy of multiple test points — commonly anywhere from three to 11 different test points. Trying to adjust and fine-tune the system pressure for each of the specific points can not only be time-consuming but difficult as well. Each individual point will require a technician to increase or decrease the pressure by pumping the system up or releasing pressure, and fine-tuning the pressure using a fine adjust vernier on the test pump. But there is a way to simplify this process not only by saving time but also cost.
Taking the time upfront to carefully match the hand pump to the pressure range of the transmitter being tested can help simplify the work. For instance, some portable pneumatic pumps have pressure ranges that go up to 600 psi/40 bar. For very low pressure calibrations, pressure pumps with a range of 100 psi/7 bar have a fine-tuning vernier, which allows very small adjustments to support inH2O adjustments. Many of these pumps also support performing vacuum adjustments.
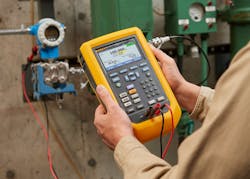
With the right pressure calibrator, generating and controlling pressure for each test point can be done with one press of a button. The whole process can be simplified by inputting the transmitter’s upper and lower range values along with the desired strategy of set points. The calibrator can run through the process on its own — without hand pumps or manual adjustments.
Achieving repeatability when calibrating a pressure switch
Calibrating a pressure switch can be a time-consuming task and, as with all calibrations, repeatability is the key to success. But the steps to achieve repeatability require a technician to apply slow changes in pressure as the switch approaches its defined set or reset point. Not only does this process require determining where the switch sets, but you also need to make sure the vernier or fine adjustment mechanism of your test pump has the capability of varying pressure up to the set point and back to the switch reset point. But these adjustments are made manually, making it difficult to easily repeat.
With practice, technicians can get the fine adjustment of the pump within range of the set and reset point pressure more regularly, but the process can also be further simplified with the pump selection or calibrator. Selecting a pump with a wide adjustment range allows a technician to more accurately make adjustments that meet the UUT measurement needs. Some calibrators will automatically find and document the switch set point, reset point and deadband, saving technicians time while providing reliable, repeatable results.
Documenting a pressure calibration
Maintaining pressure calibration documentation is an important part of the process, not only to maintain accurate critical measurement records but also to allow for traceability down the line. But many technicians have a hard time juggling the number of steps associated with the process and the number of tools required for the average pressure calibration. For example, your typical pressure calibration could require at least four different tools:
- Multifunction calibrator.
- Pressure module or gauge for measuring pressure.
- A pump to generate pressure.
- Hoses and fittings for each device (including connections to the pressure transmitter itself).
Beyond just ensuring you have the right tools before walking into the field, a technician also needs to fully plan out and prepare for specific calibrations. That means going step by step through the process to test their setup, making sure equipment is properly calibrated and caring for all the components they may need with them.
Before a test begins, they would also need to go through and either write out the test procedure or fill in a method sheet.
Then, during the procedure they must document multiple aspects of the test — the pressure being applied, the resulting mA output being measured — and then determine whether the UUT passes or fails according to the determined criteria. If the unit under test fails the “As Found” test, the technician will need to adjust the system as necessary and perform the “As Left” test. A Documenting Process Calibrator (DPC) with an automatic electric pump eliminates the need for carrying a separate hand pump, and built-in HART communication on equipped pressure calibrators allows technicians to make adjustments on the spot rather than having to carry along additional tools. And, with automated documentation, managing calibration data has never been easier. Plus, special-purpose test hoses and connectors can make pressure connections easier and reduce the likelihood of leaks, eliminating one source of testing difficulty.
Bob Crepps is a product specialist with Fluke Corporation, focusing on the process calibration tools group. He has more than 30 years of experience providing technical support and training in the electronics industry. Crepps has been offering his expertise to Fluke Process Tools for 10 years.


