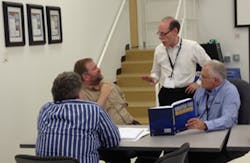
Today was Day 2 of David W. Spitzer's Industrial Flow Measurement Seminar at Endress+Hauser's Process Training Unit in Chalfont, Pa. Topics of discussion ranged from linearization and compensation, totalization, calibration best practices, and flowmeter classification. The following are five interesting tidbits I picked up during today's proceedings.
1. Flowmeters can be classified as follows:
Wetted Moving Parts: Positive Displacement; Turbine; Variable-Area
Wetted with No Moving Parts: Differential Pressure, Oscillatory, Target, Thermal
Obstructionless: Coriolis Mass, Magnetic, Ultrasonic
Non-Wetted External: Ultrasonic, Correlation
2. Flowmeters can be broken down by measurements as follows …
Volume: Positive-Displacement
Inferrential: Differential-Pressure, Target, Variable Area
Mass: Coriolis Mass, Thermal
3. When designing impulse tubing for a steam DP measurement on horizontal pipe, it is best to orient the transmitter downward off the side or top of the pipe. If you orient upward, you will get steam in the transmitter and potentially cause damage.
4. There is a myth out there that says 10 diameters of straight run upstream and 5 diameters of straight run downstream is sufficient for orifice plate flowmeters. In reality, you need a lot more straight run pipe up and down for orifice plates to operate properly.
5. When piping a magnetic flowmeter, you typically want the electrodes to be located on the side of the pipe rather than top and bottom. If there is air in the pipe and the electrode is on the top of the pipe, the air may cause performance problems. Likewise, if there is dirt or debris on settled in the pipe, it would hinder performance of a bottom-mounted electrode.
RELATED:
Day 3: 5 Things I Learned at the Industrial Flow Measurement Seminar
Day 1: 5 Things I Learned at the Industrial Flow Measurement Seminar
For links to David W. Spitzer's recent contributions to Flow Control magazine, click here. For more information on training opportunities through Endress+Hauser's Process Training University, click here.


